Pages

Monday, March 28, 2016

Bunny Buns for Easter Dinner


Happy Easter to all!

In true holiday custom,
we gathered together at the in-laws
house on Easter Sunday.  Each arriving with 
the "dish to pass" , or several!

I couldn't resist trying my hand
at the cute little bunny dinner rolls
I'd seen on Pinterest.

I watched a couple of youtube videos.
There was one where the bunny ears
were cut into the ball of dough with kitchen shears, 
but baked up more like kitten ears.
I decided maybe I didn't want to go that route.

I went with the one where she added 
second piece of dough, sticking it onto
the ball of dough that was the bunny body.
The smaller ball of dough was flattened
into an oval and cut 1/2 way through
to form ears. 

The ears were further shaped by 
rolling a wooden skewer across the
middle of each ear to indent.
Eyes were marked on either side of
the face with the skewer as well.


Here they are put together and left to rise some.
I really didn't fuss excessively, some looked
better than others, I was just hoping they'd
still be recognizable after they'd increased
in size.


They are puffing up.....


The faces and ears sort of just 
blended into the body, but were still 
recognizable after baking.


I was happy with them.

They were dinner rolls but 
with a hint of bunny.

Althooough... my nephew did say he noticed
the dinner roll he ate was oddly shaped
but just though it had gone wrong.
Then in going back taking a second look
over the whole basket he laughed and said 
 "Oh, they are bunnies!"

Everyone else recognized them at first
glance and thought they were adorable.


An egg wash before baking
helped them bake up a beautiful golden color.


My mom always put a light coating
of butter on top of her freshly baked
homemade dinner rolls.

It keeps the crust soft and give a nice shine.


 Each bunny buns was placed in a cupcake liner
and tucked in a basket with Easter grass
for presentation at Easter Dinner.


Enjoyed by all.


Thank you for visiting today.

Hop back soon!
Friday, March 18, 2016

Decorated Easter Tree


I did a quick change of the 
office tree decor this afternoon.
Easter is so early this year,
just one 10 days after St. Patrick's Day!


Visitors to our waiting room 
frequently tell us how much
 they enjoy the tree, 
they look forward to seeing
how it will be decorated 
the next time they visit.

Many people passing in the hallway
stop to admire the tree.

Some even take pictures!


So today she has been
all dressed up for Easter with
a string of colored egg lights,
purple tulle,
 a narrow lavendar tinsel garland,
little baskets painted in
springtime pastel colors filled with 
green Easter grass,
colored eggs hung with pretty
fabric ribbons


and my absolute favorite pieces, which are
paper castings made by myself,
"chocolate" bunnies and eggs! 
Read more about them in a previous post


Don't they just look good enough to eat?


Thank you for visiting today,
I wish you a Happy and Blessed Easter.


Sharing at 

Until next time,
Warm Hugs,
BettyJean

Thursday, March 17, 2016

An Altered Vintage Window Project


Hi, thanks for stopping by today.

Pour a cup of tea and come with me,
I'm excited to show you a project 
 I put together for a bridal shower gift.

I took an old 4 pane window I picked up
at a yard sale that I'd been saving
for something special.


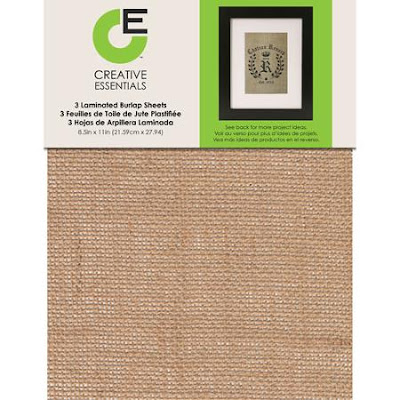
Then I used these laminated
sheets of burlap...
they go right in my printer like a sheet of
copy paper.


I chose a font I liked and
printed a large letter-- one per page
to spell L O V E,

and mounted the sheets in the window
like so...


Did you notice the two screws
on the center vertical piece of the window frame?

I like a stacked frame look and went 
with that for this project.
Let me explain....

I had a 5 x 7 inch photo frame that I liked
because of the moulded details 


painted it an antique white to coordinate
with the window frame.

Then I hung the photo frame on the
two screws in the center of the window.

I wanted the photo frame to be secure
enough so as not to fall off at the slightest
bump (say when you dust it or whatever)
but yet still be removable to
change out the photo as desired.


A wide burlap ribbon covers the hanger wire
and just gives the whole piece that finishing touch.

What do you think?
Do you think the bride be happy with her gift?

Thanks for visiting me today.

Sharing at  Share Your Cup Thursday

Until next time

Warm Hugs,
BettyJean