Pages

Showing posts with label Church Bazaar. Show all posts

Thursday, November 27, 2014

Clothespin Snowman Tree Ornaments


I stumbled upon these
sweet little
covered clothespin snowmen
and decided I'd make a few for our
annual church Bazaar.

Click here ,or on the photo, to go to that post.


I dug out a package of clothespins
from my stash of craft supplies,

some natural batting to cover them, 

and black felt for the hats....


But, hmm...
the whole time I was
working with them
I couldn't help thinking
they looked like
....uh..
um.....like,
well, 
    
like tampons. 
Sorry,
I just couldn't shake that thought.

So I did a little alteration
and redesign.

Wrapping a little Fiberfil or polyester batting
around the bottom half of the clothespin
before covering him with the natural batting
gives him a little fuller shape.


I like it!

To make them even more
"my own",
instead of the hand-stitching the
eyes, nose and buttons
as in the inspiration clothespin snowmen,
I used embroidery floss french knots
 for eyes and buttons.
and used the pointy end of a toothpick
painted orange for a nose.
A homespun scarf
and a jaunty little black felt hat.

Update:  To make the hat, I cut a piece of black felt
3" long and 2 1/4" wide.
Folded in half.
The Folded side is the top of the hat.
It is now 2 1/4" wide and 1 1/2" top to bottom.
To resemble the top-hat with brim shape, I trimmed  
with scissors at an angle on both sides.  The trimmed hat piece should measure the same 2 1/4" on the bottom and angle up from both sides to the folded top to measure 1 1/4", so there is 1/2" cut off of each top side and angled down to the full 2 1/4" bottom of the hat.
I hope that makes sense, I don't have a photo.
Run a thin bead of hot glue to close both sides of the hat.
Inserted a bit of fiber-fil stuffing.
Then hot glued around the snowman head 
and positioned the hat.
Tied on a piece of jute twine to cinch the hat a bit and knot.


A little dusting of glittery "snow" on the hat,
and he's all ready to go to the Bazaar.


I'll be showing more
handmade Christmas ornaments
at our next Tea Party
so please, do plan to attend won't you.


Warm hugs,
BettyJean


Sunday, December 2, 2012

Rose Trellis Angel and Christmas Doors & Porches

click photo to enlarge


Here she is all finished and waiting to go
to the Church Bazaar.
 
Of the pieces I donated to the annual Bazaar fundraiser,
she was the first to find a new home.


Transformed from a few odd pieces...
 
a small rose trellis on a summer clearance
sale for just a couple dollars,
a white painted wreath for under a dollar at
a resale thrift shop,
and a glittered, white painted bunch of twigs
from a crafters garage sale
still sealed in the bag.


First I removed the outdated existing decoration on 
 the wreath.
 
Then hot glued and wired everything together
like this...


Added some faux pine branches
and a big bow made from upholsterer's webbing.


Sorry she doesn't show up very well in these photos
against this stone wall.


But I'm sure she will look amazing in her
new home...
...I imagine her on a porch
next to the front door welcoming guests
for the holiday season.
 
Here are some Holiday decorated
Doors and Porches found around the internet...
 

 See 10 more porch decorating ideas at


My dream house has a big wrap around porch... 
 
click photo to enlarge
 
Do you live in a house with a front porch?


Thursday, November 22, 2012

Lighted Glass Block Update


click photos to enlarge
 
 
As promised in an earlier post
here is the lighted cardinal block.
 
I tried several different ribbons
patterned...solid...glittery...red...blue...gold,
wrapped around the block with a big bow,
with holly/pines poked in 
but couldn't get anything to look "right".
 
I felt it was just all too much
and distracted from main focal point.
I preferred it left without any additional
decoration.
 
Here is another block I painted with the
Plaid Gallery Glass paint.
 
I know it's not Christmasy, it can be enjoyed
throughout the year.


I only managed to get two cardinal blocks
and this one rose block
completed for the church bazaar.
 
I'm happy to report that
they all 3 sold and I have an order for
another cardinal.
 
So glad to have done my small
part in helping raise money for this 
annual worthwhile fundraiser.
 
Warm Hugs,


Monday, November 19, 2012

Another Burlap Wreath


This wreath is decorated with burlap roses,
real pinecones, (faux)pine branches,
 and holly leaves.
 

Take a closer look at the holly leaves.


They're made from a music page
with an antiqued edge.


The inspiration for these came from
Karen at Todolwen.
Karen is so talented in making the most
beautiful creations.
You must visit her blog here.
 
I can't decide whether I prefer the wreath
to be hung with the decoration at the bottom
or to the lower side.
 
Which do you prefer?


You may read about another one
of my Fall Burlap Wreaths
in a previous post here .


Today I'm partying here
 Six Sisters
Homa Styles No Red Christmas Decor Party
Join us won't you!!


Warm Hugs,


Sunday, November 18, 2012

More Pedestal Snowmen


Meet my trio of snowmen.
 
Dressed in their hats and scarves
they stare in wonder and anxious anticipation
 as they wait to
go to the Church Bazaar.
 
 
It will be a day filled with lots
hustling, bustling of shoppers.
 
The sounds of laughter and conversation
mixed with
Christmas music playing in the background.
 
The mouthwatering aroma
of something delicious wafting  from the
adjoining banquet room.
 
Some will stop to admire the trio,
picking them up and repositioning them on the table.
 
Who will fall in love with each of them
to give them a new home
or think they will be "the perfect gift" for
someone on their Christmas list.

 
Although a bit larger in size and
standing in a slightly taller pedestal,
 
Mr. Green looks very
similar to...
 
 
...Mr. Blue 
from my previous post here


Then there is the man in the Red hat.
 
 
Mr. Red is the smallest
of the three
 
but in my opinion has the biggest personality.


He is dressed in a white scarf,


has jingle bell buttons
 
 and wears a black belt
around his middle bump.


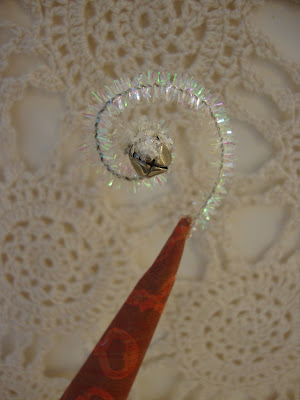
He has a little jingle bell
on the
curly tip of
his hat.


He is positioned on a very familiar style of
red boot.
 
With a little pile of glittery "white stuff " on the toe.


Before the end of the day,
I'm happy to report they each found a new
home where they will be well-loved
and displayed in a place of honor.


Warm Hugs for the Holidays,


Thursday, November 8, 2012

My Pedestal Snowman Project


My inspiration came from here


Page 76


They used clay....
 
I used styrofoam


with gloved hands and drywall joint compound


I covered the styrofoam balls

 
just smear it on


then let the joint compound dry thoroughly 


paint with acrylic craft paints and let dry
 
brush on a little decoupage glue and apply glitter to the upper half of the "snowballs"
 
add buttons...


tinsel


wire arms...


 vintage style snowman face with
 a little styrofoam bump glued on for a nose...


a tall narrow cone hat
as pictured in the inspiration photo


I chose to glue my snowman to a
pedestal  (small chrome candle holder)


I love how he turned out !!!


I'm off to make a few more for our upcoming
Annual Church Bazaar.
  
Go here to see a different snowman I made
 for last year's Bazaar.
 
 
Warm Hugs,